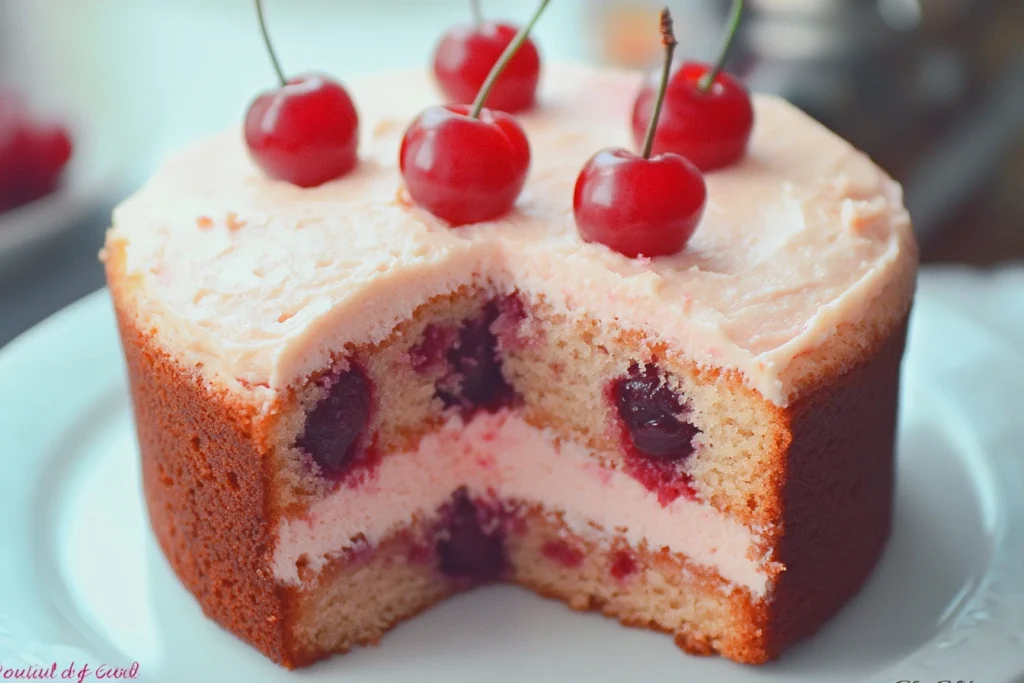
Are you dreaming of biting into a slice of tender cherry cake, where every forkful delivers juicy bursts of sweet-tart cherries nestled in a buttery, melt-in-your-mouth crumb? The aroma of vanilla and almond mingling with the fruity perfume of cherries as it bakes… the gorgeous ruby-studded slices that make everyone’s eyes widen with delight.
This isn’t just any cherry cake recipe. Today, I’m sharing my most requested, perfected-over-years cherry cake that guarantees perfectly distributed cherries (no sinking!), a wonderfully moist texture that stays fresh for days, and foolproof instructions even beginners can follow with confidence. Whether you’re baking for a special occasion or simply craving a fruit-filled treat, this cherry cake recipe delivers professional bakery results in your home kitchen.
Why This Is The BEST Cherry Cake Recipe
What makes this cherry cake stand head and shoulders above other recipes? Let me count the ways:
- Exceptional moisture retention – The carefully balanced ratio of ingredients and special mixing technique ensures this cake stays deliciously moist for days (if it lasts that long!)
- Perfect cherry distribution – No more cherries sinking to the bottom! I’ll show you the simple but crucial trick that ensures those juicy gems stay beautifully suspended throughout every slice.
- Versatile base – Works beautifully with fresh, frozen, or even canned cherries, so you can enjoy this cake year-round.
- Balanced sweetness – Not too sweet, allowing the natural flavor of the cherries to shine through.
- Simple techniques – No complicated methods or specialty equipment required, just straightforward baking steps anyone can master.
- Consistent results – This recipe has been tested countless times to ensure it works perfectly every single time.
Recipe Snapshot
| Prep Time | Bake Time | Total Time | Yield | Skill Level |
|---|---|---|---|---|
| 25 minutes | 50-55 minutes | 1 hour 20 min | 12 slices | Intermediate |
Ingredients
For the Cherry Cake:
- 2¼ cups (280g) all-purpose flour, plus 2 tablespoons for coating cherries
- 2½ teaspoons baking powder
- ½ teaspoon salt
- ¾ cup (170g) unsalted butter, softened at room temperature
- 1½ cups (300g) granulated sugar
- 4 large eggs, room temperature
- 2 teaspoons pure vanilla extract
- ½ teaspoon almond extract (optional, but enhances cherry flavor)
- ¾ cup (180ml) whole milk, room temperature
- 2 cups fresh cherries, pitted and halved (about 350g pitted weight) Can substitute 2 cups frozen cherries (thawed and drained) or 2 cups drained canned cherries
For the Simple Cherry Glaze (Optional):
- 1 cup (120g) powdered sugar, sifted
- 2-3 tablespoons cherry juice (from fresh or canned cherries)
- ¼ teaspoon almond extract (optional)
Equipment Needed
- 9-inch round cake pan or springform pan (at least 2½ inches deep)
- Parchment paper
- Electric mixer (stand or handheld)
- Large mixing bowls
- Rubber spatula
- Whisk
- Cherry pitter (if using fresh cherries)
- Cooling rack
- Measuring cups and spoons
- Kitchen scale (recommended for most precise results)
Step-by-Step Instructions
- Prepare your workspace: Preheat your oven to 350°F (175°C). Grease your cake pan thoroughly and line the bottom with parchment paper. If using a springform pan, wrap the outside with aluminum foil to prevent leakage.
- Prepare the cherries: If using fresh cherries, pit them and cut them in half. Place the prepared cherries in a bowl, sprinkle with 2 tablespoons of flour, and gently toss until all cherries are lightly coated. This crucial step helps prevent cherries from sinking during baking.
- Mix dry ingredients: In a medium bowl, whisk together the 2¼ cups flour, baking powder, and salt. Set aside.
- Cream butter and sugar: In a large bowl using an electric mixer, beat the softened butter and sugar together on medium-high speed until light and fluffy, about 3-5 minutes. Don’t skimp on this step—proper creaming incorporates air into the batter for a tender cake.
- Add eggs and extracts: Add eggs one at a time, beating well after each addition until fully incorporated. Scrape down the sides of the bowl as needed. Beat in the vanilla extract and almond extract (if using).
- Alternate dry ingredients and milk: With the mixer on low speed, add one-third of the flour mixture and mix until just combined. Add half the milk, mix, then another third of flour, remaining milk, and finish with the final third of flour. Mix only until just combined—overbeating will develop gluten and result in a tough cake.
- Fold in cherries: Gently fold in the flour-coated cherries using a rubber spatula, being careful not to crush them.
- Bake the cake: Pour the batter into the prepared pan and smooth the top with a spatula. Bake in the preheated oven for 50-55 minutes, or until a toothpick inserted into the center comes out with just a few moist crumbs (no wet batter).
- Cool properly: Allow the cake to cool in the pan for 15 minutes, then carefully remove and transfer to a wire cooling rack to cool completely, about 1-2 hours.
- Prepare glaze (if using): While the cake cools, whisk together the powdered sugar, cherry juice, and almond extract (if using) until smooth. Adjust consistency by adding more powdered sugar if too thin or more cherry juice if too thick.
- Glaze the cake: Once the cake is completely cooled, drizzle or pour the glaze over the top, allowing it to run down the sides naturally for a beautiful finish.
Key Tips for Cherry Cake Success
Getting a Perfectly Moist Cherry Cake:
- Room temperature ingredients are non-negotiable: Cold ingredients don’t emulsify properly, resulting in dense, uneven texture.
- Don’t overmix the batter: Once you start adding flour, mix just until incorporated to avoid developing gluten which toughens cake.
- Measure flour correctly: Fluff, spoon into measuring cup, and level off (or better yet, use a scale).
- Watch your baking time carefully: Even 5 minutes too long can dry out your cake.
Preventing Cherries from Sinking:
- The flour coating is essential: Don’t skip tossing cherries in flour before folding into batter.
- Use proper batter consistency: The batter should be thick enough to suspend the fruit.
- Halve larger cherries: Smaller pieces are less likely to sink.
- Consider using room temperature or slightly chilled cherries rather than frozen ones, which create cold spots in the batter.
Perfect Texture Every Time:
- Properly cream the butter and sugar: This creates millions of tiny air pockets for a light, tender crumb.
- Don’t open the oven door during the first 30 minutes of baking to prevent temperature fluctuations.
- Bake in the center rack of your oven for the most even heat distribution.
Delicious Cherry Cake Variations
Cherry Type Variations:
- Sweet Cherries: Bing, Rainier, or Black cherries provide a sweeter profile perfect for dessert.
- Sour Cherries: Montmorency or Morello cherries offer a wonderful tartness that balances beautifully with the sweet cake.
- Frozen Cherry Option: Use frozen cherries without thawing, but toss in flour while still frozen and fold quickly.
- Canned Cherry Method: Drain very well (save juice for glaze), pat dry, then toss in flour before folding in.
Flavor Enhancers:
- Almond Boost: Increase almond extract to 1 teaspoon for a more pronounced cherry-almond pairing.
- Citrus Zest: Add 1 tablespoon lemon or orange zest to brighten flavors.
- Spice Addition: ¼ teaspoon of cinnamon or cardamom adds subtle warmth.
- Chocolate Cherry: Fold in ½ cup mini chocolate chips along with the cherries.
Format Variations:
- Cherry Bundt Cake: Use a 10-cup Bundt pan and increase baking time to 60-65 minutes.
- Cherry Cupcakes: Fill cupcake liners ⅔ full and bake for 18-22 minutes (makes about 24).
- Cherry Loaf: Use two 9×5-inch loaf pans and bake for 45-50 minutes.
- Cherry Sheet Cake: Use a 9×13-inch pan and reduce baking time to 35-40 minutes.
Topping Ideas:
- Streusel Topping: Combine ½ cup flour, ¼ cup brown sugar, ¼ cup cold butter, and ¼ cup sliced almonds; sprinkle over batter before baking.
- Cream Cheese Frosting: For a richer dessert, top with classic cream cheese frosting.
- Simple Dusting: A light sprinkle of powdered sugar is elegantly understated.
- Fresh Cherry Garnish: Top each slice with fresh cherries and a mint leaf for special occasions.
Serving Suggestions
Transform your cherry cake from a simple treat to a memorable dessert experience with these perfect pairings:
- Classic Accompaniments: A dollop of freshly whipped cream or a scoop of vanilla ice cream creates a delightful temperature and texture contrast.
- Beverage Pairings: Serve with coffee for breakfast, afternoon tea, or a glass of prosecco for an elegant dessert.
- Sauce Options: A drizzle of warm chocolate sauce or homemade cherry compote elevates each slice.
- Special Occasion Presentation: Layer with cherry-flavored whipped cream for a more elaborate dessert, perfect for birthdays or celebrations.
Storage Instructions
Your cherry cake will stay delicious for several days when stored properly:
- Room Temperature: Store in an airtight container for up to 2 days. Best for maintaining perfect texture.
- Refrigerator Storage: If your kitchen is warm or you’ve used a cream-based frosting, refrigerate in an airtight container for up to 5 days. Allow to come to room temperature before serving for best flavor and texture.
- Freezing Instructions: Wrap individual slices or the entire unfrosted cake tightly in plastic wrap, then aluminum foil, and freeze for up to 3 months. Thaw overnight in the refrigerator before bringing to room temperature to serve.
- Freshness Tip: If storing more than a day, place a slice of bread in the container with the cake—the bread will go stale instead of your cake!
Troubleshooting Common Cherry Cake Problems
My Cake Is Too Dry
- Cause: Overbaking, too much flour, or incorrect measuring.
- Solution: Check your cake 5-7 minutes before the recipe suggests. Remember that residual heat continues cooking the cake after removal from the oven. For your next cake, measure flour by spooning into the measuring cup rather than scooping directly from the bag.
All My Cherries Sank to the Bottom
- Cause: Cherries too heavy for the batter, inadequate flour coating, or thin batter.
- Solution: Make sure cherries are well-coated with flour before adding to the batter. Consider cutting larger cherries into smaller pieces. Make sure your batter has proper consistency—it should be thick enough to support the fruit.
My Cake Cracked on Top
- Cause: Oven temperature too high or cake placed too high in the oven.
- Solution: Use an oven thermometer to verify temperature accuracy and place the cake on the middle rack. The crack doesn’t affect taste, so you can always cover it with glaze or frosting!
Cake Sank in the Middle
- Cause: Underbaking, opening the oven door too early, or overmixing the batter.
- Solution: Ensure the cake is fully baked by using the toothpick test. Keep the oven door closed for the first 30 minutes of baking. Mix batter just until ingredients are incorporated.
Uneven Cherry Distribution
- Cause: Not folding in cherries evenly or cherries sticking together.
- Solution: Make sure cherries are separate from each other before adding to batter. Use a gentle folding motion to distribute them evenly throughout the batter rather than stirring.
Frequently Asked Questions
Q: Can I use frozen cherries for this recipe?
A: Absolutely! You have two options: either thaw, drain well and then coat with flour, or use them directly from frozen (this works especially well in summer). If using frozen, toss them in flour while still frozen and fold quickly into the batter.
Q: How do I keep cherries from sinking to the bottom of my cake?
A: The flour coating is crucial—it creates a barrier that helps cherries grip the batter. Also, using a properly thick batter, cutting larger cherries into smaller pieces, and not overmixing after adding cherries all help with proper distribution.
Q: What’s the best type of cherry to use in baking?
A: For sweet cherry cake, Bing or Rainier cherries work beautifully. For a more tart flavor profile that balances the cake’s sweetness, sour cherries like Montmorency are excellent. The choice depends on your personal preference for sweetness level.
Q: How do I pit cherries without a cherry pitter?
A: You can use a pastry tip, paperclip, or even a chopstick to push the pit out from the stem end. Alternatively, you can cut around the pit with a knife, though this is more time-consuming.
Q: Can I make this cake with other fruits?
A: Yes! This versatile cake base works well with blueberries, raspberries, peaches, or plums. Just follow the same technique of coating the fruit with flour before folding into the batter.
Q: Why add almond extract to cherry cake?
A: Almond and cherry flavors have a natural affinity that enhances each other. The almond extract amplifies the cherry flavor without overpowering it. However, it’s optional if you have nut allergies or simply prefer without.
Q: How can I tell when my cherry cake is perfectly baked?
A: Insert a toothpick into the center—it should come out with a few moist crumbs, but no wet batter. The cake should also slightly pull away from the sides of the pan, and the top should spring back when lightly pressed.
Conclusion
There’s something truly special about a homemade cherry cake. The vibrant pops of fruit, the tender crumb, and that perfect balance of sweet and tart flavors create a dessert that’s both comforting and elegant. With the detailed techniques and troubleshooting tips in this recipe, you’re now equipped to bake a cherry cake that will impress everyone lucky enough to enjoy a slice.
I encourage you to embrace the seasonal nature of cherries when possible—there’s nothing quite like a cherry cake made during the height of cherry season when the fruit is at its peak flavor. However, with the variations provided, this can truly be a year-round treat your family will request again and again.
Have you tried this cherry cake recipe? I’d love to hear about your experience in the comments below! Did you try any of the variations? Share your photos and let us know how it turned out. And if you have any questions, I’m here to help ensure your cherry cake is absolutely perfect.
Happy baking!

