Introduction to Chocolate Panna Cotta
Chocolate Panna Cotta, an elegant twist on the classic Italian dessert, is a true culinary marvel. Originating from the Piedmont region of Italy, traditional Panna Cotta, meaning ‘cooked cream,’ has evolved into various flavors, with chocolate being a particularly decadent choice.
The Origin and Popularity
The journey of Panna Cotta began in Italy, but its simplicity and versatility have earned it a spot in dessert menus worldwide. The addition of chocolate to Panna Cotta not only enhances its flavor but also adds a touch of sophistication, making it a favorite for dinner parties and romantic evenings. The popularity of Chocolate Panna Cotta lies in its silky texture and the perfect balance of sweetness and richness.
In the next part, we’ll dive into the essential ingredients that make Chocolate Panna Cotta a creamy and irresistible dessert.
Traditional Panna Cotta offers a glimpse into the dessert’s origins and traditional preparation methods, providing a foundation for understanding its chocolate variant.
The Basic Ingredients
Essential Ingredients for Chocolate Panna Cotta
Creating the perfect Chocolate Panna Cotta begins with a selection of simple yet high-quality ingredients. The beauty of this dessert lies in its minimalism, where each component plays a crucial role in achieving that luxurious texture and taste.
Choosing the Right Chocolate
The star of the show is undoubtedly the chocolate. Opting for high-quality dark chocolate is key to a rich and intense flavor. The type of chocolate you choose can dramatically alter the dessert’s profile, so it’s worth splurging on the best you can find. Remember, the higher the cocoa content, the more profound the chocolate flavor in your Panna Cotta.
Dairy and Non-Dairy Options
Traditionally, heavy cream forms the base of Panna Cotta, lending it a creamy and velvety texture. However, for those looking for a lighter version, half-and-half or a blend of milk and cream can be excellent substitutes. For a dairy-free alternative, coconut milk or nut milks offer a delightful twist, adding their own unique flavors while maintaining the silky consistency that Panna Cotta is known for.
In the next part, we’ll step into the kitchen and walk through the step-by-step process of making this decadent dessert. From mixing the right ingredients to achieving the perfect set, we’ll cover it all.
 Step-by-Step Recipe
Preparing the Base
The journey to crafting the perfect Chocolate Panna Cotta starts with preparing the base. This process is surprisingly straightforward, yet it requires a bit of finesse. Begin by sprinkling powdered gelatin over cold half-and-half or milk in a saucepan. This step, known as ‘blooming’ the gelatin, is crucial for achieving that signature smooth texture. Allow the gelatin to absorb the liquid for a few minutes before gently heating the mixture. This ensures the gelatin dissolves without clumps.
Next, whisk in the heavy cream and sugar, stirring constantly over medium heat. The key here is to warm the mixture until it’s steaming hot but not boiling. Boiling can cause the Panna Cotta to become too firm or lose its silky consistency.
Setting the Panna Cotta
Once the base is ready, it’s time to add the chocolate. Remove the saucepan from the heat and stir in finely chopped dark chocolate until it’s completely melted and the mixture is smooth. Pouring this mixture into molds or glasses is the next step. Whether you choose traditional ramekins or elegant glass tumblers, lightly greasing them helps in the unmolding process if you plan to serve the Panna Cotta inverted.
The final step is to let the Panna Cotta set. This requires patience, as it needs to be refrigerated for at least four hours, though overnight is ideal. This setting time allows the Panna Cotta to achieve its firm yet tender texture, which is the hallmark of a well-made dessert.
Variations and Substitutions
Creative Variations and Substitutions
Chocolate Panna Cotta is a versatile dessert that lends itself to a myriad of variations, allowing you to tailor it to your taste preferences and dietary needs. These creative twists can transform the classic recipe into something uniquely yours.
Dietary Adjustments
For those with dietary restrictions, fear not! Chocolate Panna Cotta can be easily adapted. If you’re vegan or lactose intolerant, replace dairy milk and cream with almond, soy, or coconut milk. These alternatives not only make the dessert dairy-free but also infuse it with a distinctive flavor. For a sugar-free version, consider using natural sweeteners like stevia or monk fruit extract. These adjustments ensure that everyone can enjoy this delectable treat, regardless of dietary preferences.
Flavor Variations
The realm of flavor variations for Chocolate Panna Cotta is boundless. Infuse the cream with a cinnamon stick or vanilla bean for a warm and aromatic twist. For a more adventurous palate, a pinch of chili powder can add an unexpected but delightful kick. Fruit purees, such as raspberry or mango, can be layered or swirled into the Panna Cotta for a colorful and tangy contrast. The addition of liqueurs like Amaretto or Baileys can transform it into an adult-friendly dessert, perfect for dinner parties.
In the next part, we’ll delve into the art of presenting and serving Chocolate Panna Cotta, ensuring your dessert is not only delicious but also visually stunning.
Presentation and Serving Tips
Serving and Presentation Tips
The presentation of Chocolate Panna Cotta is just as important as its flavor. A well-presented dessert can elevate the entire dining experience, turning a simple meal into a memorable event.
Plating Techniques
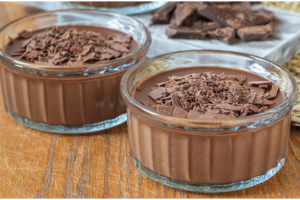
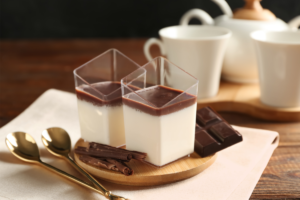
If you’ve chosen to set your Panna Cotta in ramekins and plan to unmold it, a quick dip in warm water helps loosen it. Gently invert it onto a plate, and with a little luck, it should slide out smoothly, maintaining its elegant shape. For a more modern approach, serving it directly in glass tumblers or jars adds a rustic charm and saves you the trouble of unmolding.
Accompaniments and Garnishes
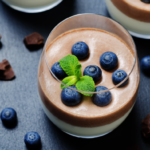
Garnishing your Chocolate Panna Cotta is where you can truly let your creativity shine. A dollop of whipped cream, a sprinkle of cocoa powder, or chocolate shavings can add a luxurious touch. Fresh berries or a drizzle of fruit coulis not only add a pop of color but also cut through the richness of the chocolate. For a festive twist, edible gold leaf or silver pearls can turn your dessert into a showstopper. Remember, the key is to enhance the dessert without overpowering its subtle flavors.
Common Mistakes and Troubleshooting
Troubleshooting Common Issues
Even the most experienced cooks can encounter hiccups when making Chocolate Panna Cotta. Understanding these common pitfalls and knowing how to fix them is key to ensuring your dessert is as flawless as it is delicious.
Texture Problems
One of the most frequent issues is achieving the right texture. If your Panna Cotta is too firm, it’s likely due to too much gelatin. To remedy this, reduce the gelatin slightly in your next batch. On the other hand, if it’s too runny, it might need a bit more gelatin or longer setting time in the refrigerator. Remember, patience is a virtue when it comes to setting Panna Cotta.
Flavor Balancing
Balancing flavors in Chocolate Panna Cotta is crucial. If the chocolate flavor is too overpowering, try using a chocolate with a lower cocoa content or increase the amount of cream and sugar to soften the intensity. Conversely, if the chocolate flavor is too mild, opt for a chocolate with higher cocoa content or add a bit more chocolate to the mix. The key is to taste as you go and adjust according to your preference.
Frequently Asked Questions
General Queries
In this section, we address some common questions about Chocolate Panna Cotta, providing clarity and additional tips to ensure your dessert-making journey is as smooth and enjoyable as the dessert itself.
Can I make Chocolate Panna Cotta in advance?
Absolutely! In fact, Panna Cotta is an ideal make-ahead dessert. It needs time to set, so preparing it a day in advance is not only convenient but recommended.
How long does Chocolate Panna Cotta last in the fridge?
When stored properly in the refrigerator, Chocolate Panna Cotta can last up to 5 days. Ensure it’s covered to prevent it from absorbing other flavors from the fridge.
Is it possible to freeze Chocolate Panna Cotta?
Freezing is not recommended as it can alter the texture, making it grainy or icy upon thawing.
Recipe-Specific Questions
Can I use milk chocolate instead of dark chocolate?
Yes, you can use milk chocolate for a sweeter, milder flavor. However, keep in mind that it might not have the same depth of flavor as dark chocolate.
What if I don’t have gelatin? Can I use agar-agar?
Yes, agar-agar is a great vegetarian alternative to gelatin. The ratio and setting times may vary, so check the packaging for instructions.
How do I know when the Panna Cotta is set?
The Panna Cotta should be firm to the touch but still jiggle slightly when gently shaken. It typically takes about 4 hours in the refrigerator to set properly.
With these FAQs addressed, you’re now equipped with the knowledge to create a flawless Chocolate Panna Cotta. Remember, cooking is an art, and like any art, it requires practice, patience, and a dash of creativity.
Conclusion
As we wrap up our journey through the delightful world of Chocolate Panna Cotta, it’s clear that this dessert is more than just a sweet treat. It’s a testament to the beauty of simplicity in cooking, where a few quality ingredients can create something truly extraordinary. Whether you stick to the classic recipe or experiment with your own variations, Chocolate Panna Cotta is sure to impress.
Remember, the key to a perfect Panna Cotta lies in the balance of flavors and textures, and the willingness to experiment and adjust according to your tastes. With the tips and tricks outlined in this article, you’re well on your way to mastering this elegant dessert.
So, gather your ingredients, unleash your creativity, and prepare to indulge in the creamy, chocolatey goodness of homemade Chocolate Panna Cotta. Bon appétit!
Print
Chocolate Panna Cotta
Ingredients
Ingredients
- 1 ½ cups of half-and-half or whole milk (for a lighter version, or use coconut milk for dairy-free)
- 1 envelope unflavored powdered gelatin (about 1 tablespoon)
- 1 cup heavy cream (use additional milk for a lighter version)
- ¼ cup sugar (adjust to taste or use a sugar substitute for a sugar-free version)
- 1 teaspoon vanilla extract
- 5 ounces high-quality dark chocolate (finely chopped; substitute with milk chocolate for a milder flavor)
- Whipped cream for serving (optional)
- Chocolate shavings for garnish (optional)
Instructions
Directions
Prepare the Gelatin Mixture:
Pour the half-and-half into a medium saucepan. Sprinkle the gelatin over and let it stand for about 5 minutes to soften (this is known as ‘blooming’ the gelatin).
Dissolve the Gelatin:
Set the saucepan over medium-low heat. Whisk gently and constantly until the gelatin dissolves, about 3 minutes. Avoid boiling the mixture.
Add Cream and Sugar:
Increase the heat to medium. Add the heavy cream and sugar to the saucepan. Continue whisking until the sugar dissolves and the mixture is steaming hot, but not boiling, about 5 minutes.
Melt the Chocolate:
Remove the saucepan from the heat. Add the vanilla extract and chopped chocolate all at once. Whisk until the chocolate melts completely and the mixture is smooth.
Pour into Molds:
Either transfer the mixture to a glass measuring pitcher for easy pouring or carefully pour directly from the saucepan into glass tumblers or lightly oiled ramekins (if you plan to unmold the dessert onto plates).
Refrigerate to Set:
Refrigerate the Panna Cotta until it is completely set, which takes about 4 hours or preferably overnight. Cover the molds if refrigerating overnight.
Notes
Serve:
Just before serving, whip the cold heavy cream with a bit of sugar and vanilla to medium-stiff peaks, if using. Top each serving of Chocolate Panna Cotta with a dollop of whipped cream and sprinkle chocolate shavings over, if desired.


 Step-by-Step Recipe