Description
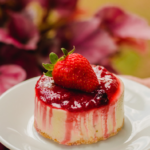
Indulge in the delightful simplicity of this No Bake Strawberry Cheesecake, a perfect blend of creamy, rich flavors and fresh, juicy strawberries. This recipe offers an easy-to-make, refreshing dessert with a buttery graham cracker crust and a smooth, luscious filling, topped with vibrant strawberries. Ideal for any occasion, it’s a crowd-pleaser that requires no oven, making it a hassle-free, delicious treat for both baking enthusiasts and novices alike. Enjoy the perfect balance of sweetness and tartness in every slice of this heavenly cheesecake!
Ingredients
For the Crust:
- Graham Cracker Crumbs: 2 cups (for a gluten-free version, use gluten-free graham crackers or almond flour)
- Butter: ½ cup, melted (use coconut oil for a vegan alternative)
- Sugar: 2 tablespoons (optional, for added sweetness)
For the Filling:
- Cream Cheese: 16 ounces, at room temperature (use dairy-free cream cheese for vegan or lactose-intolerant diets)
- Powdered Sugar: 1 cup (can substitute with agave syrup or honey for natural sweetness)
- Heavy Cream: 1 cup (use coconut cream for a vegan substitute)
- Vanilla Extract: 1 teaspoon
- Fresh Strawberries: 1½ cups, diced (can also use other berries like raspberries or blueberries)
- Lemon Juice: 1 tablespoon (orange juice can be used for a different citrus note)
For Topping:
- Fresh Strawberries: Sliced, for garnish
- Whipped Cream: Optional, for decoration
- Strawberry Jam: Optional, for glazing strawberries
Instructions
Preparing the Crust:
- Mix Crust Ingredients: In a bowl, combine the graham cracker crumbs, melted butter, and sugar (if using). Mix until the crumbs are well-coated with butter.
- Form the Crust: Press the mixture into the bottom of a 9-inch springform pan or pie dish, forming a firm, even layer. Set aside.
Making the Filling:
- Blend Cream Cheese: In a large bowl, beat the cream cheese until smooth.
- Add Sweeteners: Gradually mix in the powdered sugar (or its substitute) and vanilla extract until well combined.
- Whip Heavy Cream: In a separate bowl, whip the heavy cream (or coconut cream) until it forms stiff peaks.
- Combine: Gently fold the whipped cream into the cream cheese mixture.
- Add Strawberries: Fold in the diced strawberries and lemon juice.
- Fill the Crust: Pour the filling over the prepared crust, smoothing the top with a spatula.
Chilling the Cheesecake:
- Refrigerate: Place the cheesecake in the refrigerator and let it set for at least 4 hours, preferably overnight.
Decorating and Serving:
- Garnish: Before serving, decorate the cheesecake with sliced strawberries. Optionally, add whipped cream around the edges and glaze the strawberries with a bit of strawberry jam for a shiny finish.
- Serve: Slice and serve chilled. For individual servings, consider setting the cheesecake in glass jars or cups.
Storing:
- Store any leftovers in an airtight container in the refrigerator for up to 5 days. For longer storage, the cheesecake can be frozen for up to a month.
Notes
- Focus on the Quality of Ingredients:
- Freshness of Strawberries: The flavor of your cheesecake heavily depends on the strawberries. Always choose ripe, fresh, and aromatic strawberries for the best taste and texture. If strawberries aren’t in season, high-quality frozen strawberries can be a good alternative, but make sure to thaw and drain them well to avoid excess moisture.
- Cream Cheese Quality: Opt for a high-quality, full-fat cream cheese for a richer and creamier texture. Low-fat versions can make the cheesecake less flavorful and more prone to not setting properly.
- Homemade Whipped Cream: Instead of store-bought whipped cream, consider making your own. It’s simple to whip heavy cream with a bit of sugar and vanilla. This not only tastes better but also gives you control over the sweetness and texture.
- Master the Art of the Crust:
- Crust Thickness: The crust is the foundation of your cheesecake. Ensure it’s not too thick or too thin. A crust that’s too thick can be hard to cut through and overpower the filling, while a too-thin crust might not hold up well.
- Even Pressing: When pressing the crust into the pan, use a flat-bottomed glass or measuring cup for an even and firm base. This helps prevent the crust from crumbling when you cut the cheesecake.
- Chilling is Key:
- Patience with Chilling: The most common mistake in no-bake cheesecakes is not chilling them long enough. The cheesecake needs time to set properly, so it’s best to refrigerate it for at least 4-6 hours, though overnight is ideal. This patience pays off with a cheesecake that’s perfectly set and slices cleanly.
- Avoid Freezer Temptation: While it might be tempting to speed up the process by placing the cheesecake in the freezer, this can lead to a texture that’s too hard and icy. Stick to refrigeration for the best results.
